| Graphics | |
The Plot Browser provides a legend of all the graphs in the figure. It lists each axes and the objects (lines, surfaces, etc.) used to create the graph.
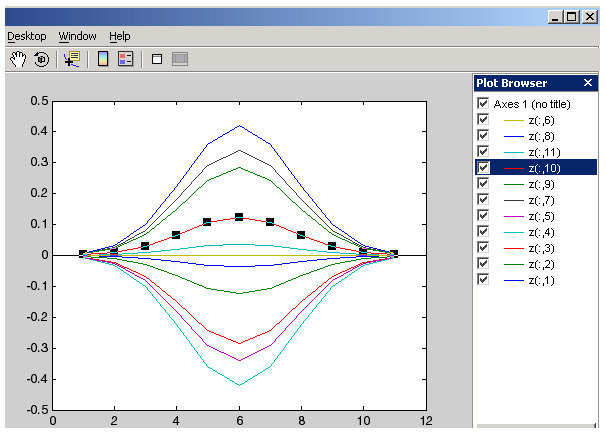
For example, suppose you plot an 11-by-11 matrix z. The plot function creates one line for each column in z.
When you set the DisplayName property, the Plot Browser indicates which line corresponds to which column.
If you want to set the properties of an individual line, double-click on the line in the Plot Browser. Its properties are displayed in the Property Editor, which opens on the bottom of the figure.
You can select a line in the graph, and the corresponding entry in the Plot Browser is highlighted, enabling you to see which column in the variable produced the line.
Controlling Object Visibility
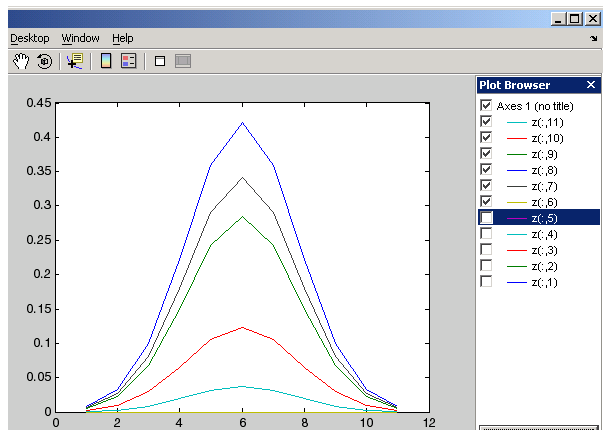
The check box next to each item in the Plot Browser controls the object's visibility. For example, suppose you want to plot only certain columns of data in z, perhaps the positive values. You can uncheck the columns you do not want to display. The graph updates as you uncheck each box and rescales the axes as required.
Deleting Objects
You can delete any selected item in the Plot Browser by selecting Delete from the right-click context menu.
Adding Data to Axes
The Plot Browser provides the mechanism by which you add data to axes. The procedure is as follows:
The Add Data to Axes dialog enables you to select a plot type and specify the workspace variables to pass to the plotting function. You can also specify a MATLAB expression, which is evaluated to produce the data to plot.
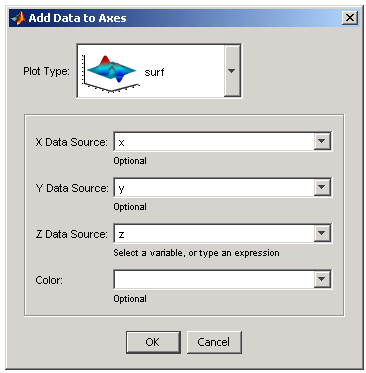
Selecting Workspace Variables to Create a Graph. Suppose you want to create a surface graph from three workspace variables defining the XData, YData, and ZData (see the surf function for more information on this type of graph).
In the workspace you have defined three variables, x, y, and z. To create the graph, configure the Add Data to Axes dialog as shown in the following picture.
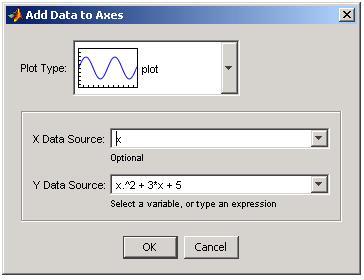
Using a MATLAB Expression to Create a Graph. The following picture shows the Add Data to Axes dialog specifying a workspace variable x for the plot's x data and a MATLAB expression (x.^2 + 3*x + 5) for the y data.
You can use the default X Data value of index if you do not want to specify x data. In this case, MATLAB plots the y data vs. the index of the y data value, which is equivalent to calling the plot command with only one argument.
| | The Figure Palette | The Property Editor | |
© 1994-2005 The MathWorks, Inc.