| Image Processing Toolbox User's Guide | |
Starting the Control Point Selection Tool
To use the Control Point Selection Tool, enter the cpselect command at the MATLAB prompt. As arguments, specify the image you want to register (the input image), and the image you want to compare it to (the base image).
To illustrate, this code fragment reads an image into a variable, moon_base, in the MATLAB workspace. It then creates another version of the image with a deliberate size distortion, called moon_input. This is the image that needs registration to remove the size distortion. The code then starts the cpselect tool, specifying the two images.
moon_base = imread('moon.tif');
moon_input = imresize(moon_base, 1.2);
cpselect(moon_input, moon_base);
The cpselect command has other optional arguments. For example, you can restart a control point selection session by including a cpstruct structure as the third argument. For more information about restarting sessions, see Saving Control Points. For complete details, see the cpselect reference page.
Default Views of the Images
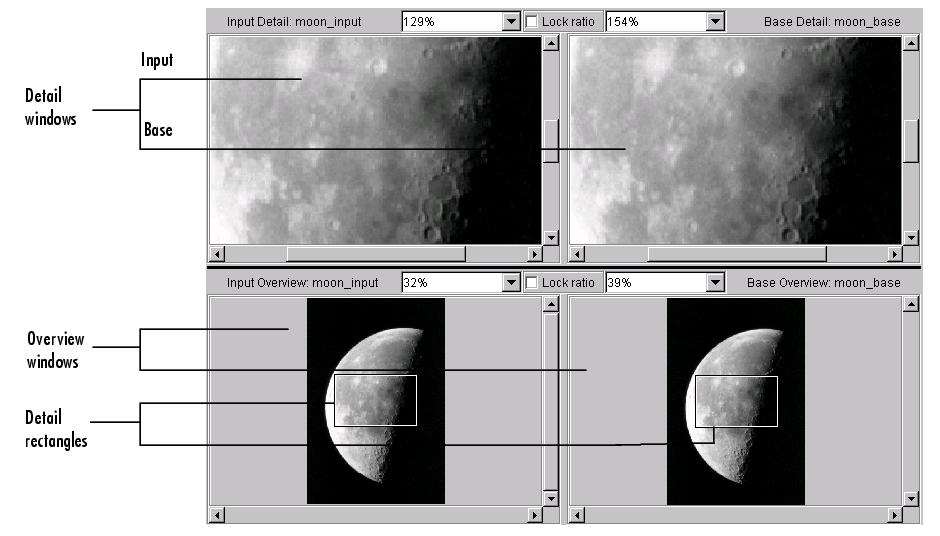
When the Control Point Selection Tool starts, it contains four image display windows. The top two windows are called the Detail windows. These windows show a closeup view of a portion of the images you are working with. The input image is on the left and the base image is on the right. The two windows at the bottom of the interface are called the Overview windows. These windows show the images in their entirety, at the largest scale that fits the window. The input overview image is on the left and the base overview image is on the right.
Superimposed on the image in the Overview windows is a rectangle, called the detail rectangle. This rectangle defines the part of the image that is visible in the Detail window. By default, at startup, the detail rectangle covers one quarter of the entire image and is positioned over the center of the image.
| | Selecting Control Points | Viewing the Images | |
© 1994-2005 The MathWorks, Inc.