| Signal Processing Toolbox | |
Step 5: Spectral Analysis in the Spectrum Viewer
You can analyze the frequency content of a signal using the Spectrum Viewer, which estimates and displays a signal's power spectral density.
For example, to analyze and compare the spectra of noise and blnoise:
spect1, that is associated with the signal noise, and a second PSD object, spect2, that is associated with the signal blnoise.
Creating a PSD Object From a Signal
[vector] signal in the Signals list of SPTool.
spect1) corresponding to the noise signal is created in the Spectra list. The PSD is not computed or displayed yet.
spect1 using the default parameters.
noise signal is displayed in the display region. The identifying information for the PSD's associated signal (noise) is displayed above the Parameters region.
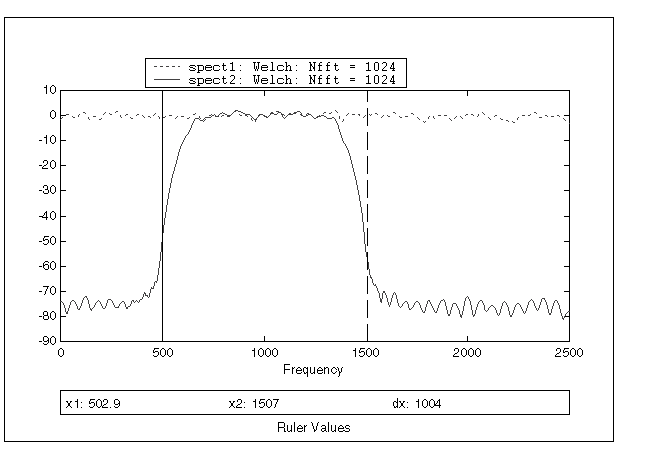
The PSD estimate spect1 is within 2 or 3 dB of 0, so the noise has a fairly "flat" power spectral density.
spect2.
spect2 is flat between 750 and 1250 Hz and has 75 dB less power in the stopband regions of filt1.
Opening the Spectrum Viewer with Two Spectra
spect1 and spect2 in the Spectra list to select them both.
Printing the Spectra
Before printing the two spectra together, use the color and line style selection button,  , to differentiate the two plots by line style, rather than by color.
 , in the toolbar on the Spectrum Viewer.
| | Step 4: Analyzing a Signal | Exporting Signals, Filters, and Spectra | |
© 1994-2005 The MathWorks, Inc.